Welcome; I’m delighted you’re here today. I’ve kept everything simple, honest, and realistic, because biscotti don’t need to be complicated to be good.
They simply require patience, high-quality ingredients, and a bit of care during baking.

Before we get into the details, here’s a quick overview so you know what to expect.
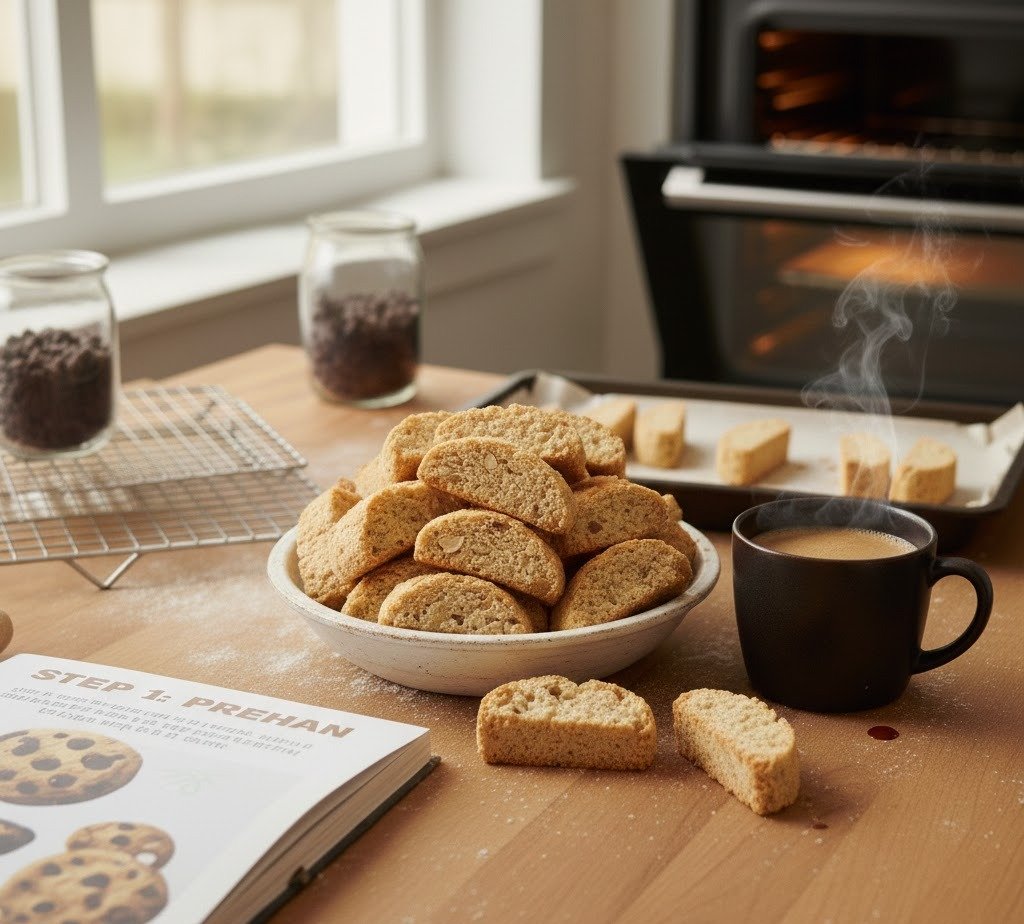
This is an Italian-style biscotti, lightly sweet, crunchy but not painful, perfect for dunking. It’s baked twice, stores well, and honestly gets better after a day or two.
Cuisine: Italian
Prep Time: about 20 minutes
Bake Time: about 1 hour total
Servings: about 24–30 biscotti
What Is Almond Biscotti?
Almond biscotti are traditional Italian cookies that are baked twice to create a dry, crunchy texture.
They’re long, sliced cookies filled with almonds and meant to be dipped into coffee, tea, or even dessert wine.
Unlike soft cookies, biscotti are intentionally firm, and that firmness is exactly what makes them special.
When made properly, they’re not rock-hard. They’re crisp, sturdy, and soften beautifully when dipped. That balance is what I always aim for.
What Does Biscotti Mean?
The word “biscotti” comes from Italian and literally means “twice-cooked.” The dough is baked once in log form, cooled, sliced, and baked again.
That second bake removes moisture and gives biscotti their signature texture and long shelf life.
This method is old, practical, and still works perfectly today.
What Are Italian Almond Biscotti (Cantucci)?
In Italy, almond biscotti are often called cantucci or cantuccini, especially in Tuscany. These versions are usually made without butter or oil and rely on eggs for structure.
The result is a drier, crunchier cookie that pairs beautifully with espresso or sweet wine.
They’re simple, rustic, and very almond-forward, which is exactly how I like them most days.
History of Almond Biscotti
Biscotti were created to last. Long before modern storage, these twice-baked cookies were ideal for travel and long keeping.
Almonds were commonly used because they were widely available and added both flavor and texture.
Over generations, families adapted the base dough slightly, adding citrus zest, extracts, or chocolate, but the method stayed the same.
Recipe Origins for Almond Biscotti
For many people, biscotti recipes come from family kitchens.
Handwritten notes, memory-based measurements, and techniques learned by watching rather than reading. That’s part of what makes them feel comforting and familiar.
This version stays close to that traditional spirit while still being approachable for home bakers.
Why You’ll Love This Almond Biscotti
You’ll love this biscotti because it’s dependable. The dough comes together easily, the shaping doesn’t need perfection, and the result is consistent every time.
It’s not overly sweet, it’s adaptable, and it doesn’t require fancy equipment.
It’s also one of those recipes that feels rewarding without being stressful, which I really appreciate.
What Makes This Biscotti Special
What I like most about this style is the balance. Enough sweetness to feel like a treat, enough crunch to hold up to dunking, and enough almond flavor to actually taste the nuts.
Nothing feels excessive, and that’s exactly the point.
Classic vs Modern Biscotti
Classic biscotti are usually made without butter or oil, which keeps them firm and dry. Modern versions often include butter or oil for richness and a slightly softer bite.
Both styles work. I tend to lean classic when I want something truly traditional and modern when I want a more snackable cookie.
Ingredients
Below is the ingredient table for this biscotti. I always recommend using room-temperature eggs and good-quality almonds, because those two things really make a difference.
| Amount | Unit | Ingredient | Notes |
|---|---|---|---|
| 2 ¼ | cups | All-purpose flour | Spooned and leveled |
| ¾ | cup | Granulated sugar | Not packed |
| 1 | teaspoon | Baking powder | Fresh |
| ½ | teaspoon | Salt | Fine sea salt |
| 2 | large | Eggs | Room temperature |
| 1 | teaspoon | Vanilla extract | Pure |
| 1 | teaspoon | Almond extract | Optional but recommended |
| 1 | teaspoon | Lemon zest | Finely grated |
| 1 | cup | Whole almonds | Raw or lightly toasted |
Equipment
You don’t need much equipment for biscotti, which is one of the reasons I make them so often.
| Amount | Equipment | Notes |
|---|---|---|
| 1 | Mixing bowl | Medium or large |
| 1 | Wooden spoon | Or sturdy spatula |
| 1 | Baking sheet | Standard size |
| 1 | Parchment paper | Prevents sticking |
| 1 | Serrated knife | For clean slicing |
| 1 | Wire rack | For cooling |
How to Make Biscotti
This process is simple, but timing matters. Take your time and don’t rush the cooling steps.
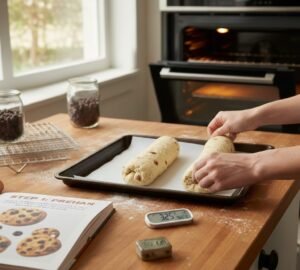
Step 1: Prepare the Oven and Pan
Preheat your oven to 325°F (165°C). Line a baking sheet with parchment paper and set it aside.
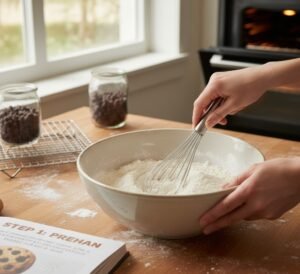
Step 2: Mix the Dry Ingredients
In a large bowl, whisk together the flour, sugar, baking powder, and salt until evenly combined. This helps distribute everything before adding the wet ingredients.
Step 3: Combine the Wet Ingredients
In a separate bowl, whisk the eggs lightly. Add the vanilla extract, almond extract, and lemon zest, then whisk again until smooth.
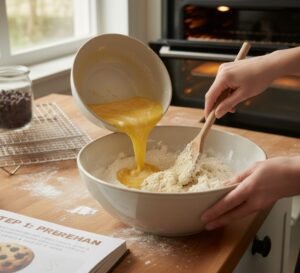
Step 4: Make the Dough
Pour the wet ingredients into the dry ingredients. Stir gently with a wooden spoon until a soft dough forms. It should be slightly sticky but manageable.
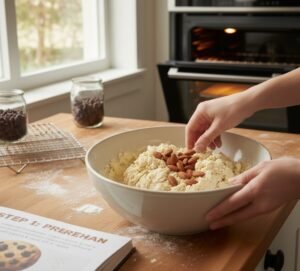
Step 5: Add the Almonds
Fold in the whole almonds until evenly distributed. If the dough feels very sticky, dampen your hands slightly rather than adding more flour.
Step 6: Shape the Logs
Transfer the dough onto the prepared baking sheet. Divide it into two portions and shape each into a log about 3 inches wide and ¾ inch thick. Don’t worry about perfection.
Step 7: First Bake
Bake the logs for about 30 minutes, until they are lightly golden and firm to the touch. Remove from the oven and let them cool on the pan for 15–20 minutes.
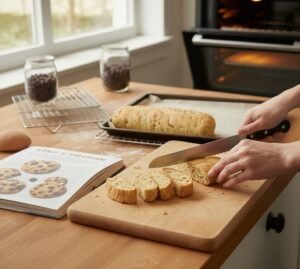
Step 8: Slice the Biscotti
Transfer the cooled logs to a cutting board. Using a serrated knife, slice them diagonally into pieces about ½ to ¾ inch thick.
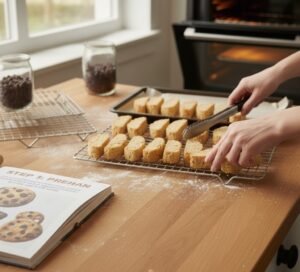
Step 9: Second Bake
Place the slices cut-side down on the baking sheet. Bake for 10 minutes, flip each piece, then bake another 10 minutes until crisp and golden.
Step 10: Cool Completely
Transfer the biscotti to a wire rack and let them cool completely. They will continue to firm up as they cool.
Tips for Best Results
Always let the logs cool before slicing. Cutting too soon causes crumbling. Use a gentle sawing motion with the knife instead of pressing down hard.
How Crunchy Should They Be?
They should be crisp but not painful. If they feel too hard, reduce the second bake time slightly next time.
Variations
You can easily customize these biscotti. Orange zest works instead of lemon.
Chocolate chips or dried fruit can be added in small amounts. Other nuts like pistachios or hazelnuts also work well.
How to Serve Biscotti
These are best served with coffee, tea, espresso, or warm milk. They’re also wonderful with dessert wine if you enjoy that pairing.
Storage Instructions
Store biscotti in an airtight container at room temperature. They keep well for up to three weeks. Avoid refrigeration, as it introduces moisture.
Freezing Instructions
Biscotti freeze very well. Let them cool completely, then store in a freezer-safe container for up to three months. Thaw at room temperature before serving.
Nutrition Information (Per Biscotti)
- Calories: approximately 110
- Carbohydrates: about 14 g
- Protein: about 2 g
- Fat: about 5 g
- Sugar: about 7 g
- Fiber: about 1 g
- Sodium: about 40 mg
Almond Biscotti Recipe
Ingredients
Equipment
Method
- Preheat the oven to 325°F (165°C). Line a baking sheet with parchment paper and set it aside.

- In a large bowl, whisk together the flour, sugar, baking powder, and salt until everything is evenly combined.
- In a separate bowl, lightly whisk the eggs. Add the vanilla extract, almond extract, and lemon zest, then whisk again until smooth.

- Pour the wet ingredients into the dry ingredients. Stir gently with a wooden spoon until a soft dough forms. It should be slightly sticky but still manageable.
- Fold in the whole almonds until they’re evenly distributed. If the dough feels too sticky, I just dampen my hands instead of adding more flour.
- Transfer the dough onto the prepared baking sheet. Divide it into two portions and shape each into a log about 3 inches wide and ¾ inch thick. Perfection isn’t necessary here.
- Bake the logs for about 30 minutes, until lightly golden and firm to the touch. Remove from the oven and let them cool on the pan for 15–20 minutes.

- Move the cooled logs to a cutting board. Using a serrated knife, slice diagonally into pieces about ½ to ¾ inch thick.
- Place the slices cut-side down on the baking sheet. Bake for 10 minutes, flip each piece, then bake another 10 minutes until crisp and golden.

- Transfer the biscotti to a wire rack and let them cool completely. They’ll continue to firm up as they cool.
Notes
FAQs:-
Are biscotti supposed to be very hard?
Biscotti are meant to be crunchy, not rock-hard. They should soften nicely when dipped in coffee or tea.
Do biscotti really need to be baked twice?
Yes. The second bake dries them out and gives biscotti their classic crisp texture and long shelf life.
Why did my biscotti crumble when slicing?
This usually happens if the logs are sliced while still warm. Let them cool first and use a serrated knife.
How long do homemade biscotti stay fresh?
When stored in an airtight container at room temperature, biscotti can stay fresh for up to three weeks.
Can I freeze biscotti after baking?
Yes, biscotti freeze very well. Once fully cooled, freeze them for up to three months and thaw at room temperature before serving.
Final Thoughts
I really love how reliable biscotti are. They don’t rush you, they don’t demand perfection, and they reward patience.
Every time I make them, I’m reminded why these simple cookies have lasted for generations. I hope you enjoy baking them as much as I do, and don’t forget, they’re always better when dunked.
Read More:- Mary Berry Cheese Scones Recipe