Welcome, today I’m diving into one of my favorite little kitchen treasures: my homemade Lime Syrup Recipe.

It’s sweet, tart, refreshing, and honestly one of those things I always keep in my fridge because it can magically transform drinks, cakes, fruit salads, and even a quick homemade vinaigrette.
Hi, my name is Sunita Devi. I am an Australian cook, like cooking food, and a housewife. I am a workaholic woman, and I make food according to my own recipe.
I make its recipe according to my own way, and the recipe is made in my own way.
Before we begin, here’s a quick overview of the recipe so you can see exactly what you’re getting into.
Cuisine: American
Prep Time: 10 minutes
Cook Time: 10 minutes
Servings: 5
Category: Drinks, Syrup
Now let’s get into this bright and zesty world of lime syrup.
What Is Lime Syrup?
Lime syrup (or lime simple syrup) is basically regular simple syrup with a citrusy makeover.
Simple syrup by itself is just equal parts water and sugar heated until the sugar dissolves, creating a liquid sweetener that blends easily into cold or hot drinks.
But when I make lime syrup, I add fresh lime juice—sometimes even zest or rinds—to make it floral, citrusy, and totally irresistible.
What I love most is that lime syrup gives you both sweetness and flavor. Want to sweeten your iced tea but also add a little zing? Lime syrup.
Want a deeper lime punch in a mocktail or cocktail? Lime syrup. Need something to brush over cake layers to keep them moist?
Lime syrup again. It’s a tiny bottle with some serious power.
And because it freezes beautifully, I get to enjoy that bright lime flavor all year long, even in the middle of winter when citrus feels like a warm-weather dream.
Ingredients You’ll Need
Ingredients in cooking include the type of food you are eating.
I keep this recipe super simple, and honestly, you probably have everything already:
| Amount | Unit | Name | Notes |
|---|---|---|---|
| 1 cup | — | Granulated sugar | White sugar only; not powdered |
| 1/2 cup | — | Water | Helps balance the acidity |
| 1/2 cup | — | Fresh lime juice | About 4–6 limes depending on juiciness |
| Optional | — | Lime rinds/zest | Adds stronger lime flavor |
Fresh limes are essential here. Look for bright green ones, no mushy spots, no browning, and definitely no shriveling.
The oil in the peel brings so much fragrance, so healthier limes give you a more aromatic syrup.
Equipment
- 2–3 quart saucepan
- Fine-mesh strainer
- Box grater or microplane (if adding zest)
- Clean glass jar or swing-top bottle
- Funnel (trust me, this helps so much)
How to Make Lime Syrup
Step 1
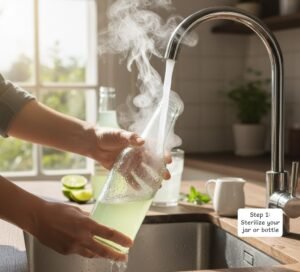
I start by cleaning my container. I wash it with hot soapy water, rinse it well, then I pour in boiling water twice. This helps the syrup last longer in the fridge.
Step 2
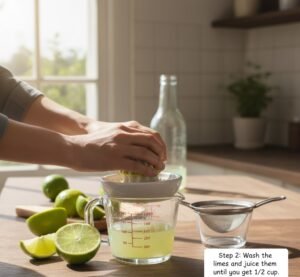
I wash my limes and roll them under my palm on the counter. This helps release more juice. Then I juice the limes until I get 1/2 cup. I usually need 4–6, depending on how plump and juicy they are.
Step 3
Next, I strain the lime juice to catch seeds or pulp. In a saucepan, I combine the sugar, water, and strained lime juice.
Step 4
I heat everything over medium-high until the sugar fully dissolves and the mixture just reaches a gentle boil. I don’t boil long—just a few seconds.
Step 5
Now comes a fun part. I add my lime rinds (or zest if I’m using zest), then return the pot to a quick simmer for about 30 seconds. This pulls out all that bright lime oil and flavor.
Step 6
I remove the pan from the heat, cover it, and let it steep. Sometimes I steep 10 minutes, sometimes for a full hour.
A longer steep means a slightly bitter, more grown-up citrus flavor. I personally love it a little bitter, like a lime marmalade vibe.
Step 7
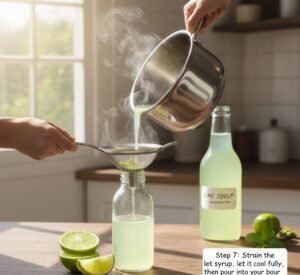
I strain everything through a fine-mesh sieve, pressing lightly on the rinds to get every last drop. Then I let the syrup cool completely before bottling it.
Done. Simple, beautiful, bright lime syrup ready for everything.
How to Store Lime Syrup
I always store mine in a glass jar with a tight lid. Because this syrup contains fresh juice—not just sugar and water—it must be refrigerated.
It lasts up to 4 weeks in the fridge. You can also freeze it for 6 months. Frozen syrup also makes adorable flavor cubes for iced tea and sparkling water.
Ways to Use Lime Syrup
Once you make this syrup, you’ll start splashing it into everything—at least I always do.
- Add it to club soda or ginger beer for a refreshing non-alcoholic drink.
- Stir into iced tea or hot tea.
- Brush it onto cake layers to keep them moist and flavorful.
- Drizzle onto fruit salad for a citrus pop.
- Use in classic cocktails like mojitos, margaritas, or Moscow mules.
- Pour over pound cake, Bundt cake, or even shortbread cookies.
- Add a spoonful to smoothies for brightness.
Recipe Tips From My Kitchen
- Don’t use limes that feel mushy or look shriveled. They lack flavor.
- Limes with bright green smooth skin usually contain more fragrant oils.
- An electric juicer gives the most juice, but a handheld is fine, too.
- Don’t add lime juice to boiling syrup if you want a super fresh flavor—heat can dull citrus.
- For deeper bitterness, steep the rinds longer; for a cleaner flavor, steep less.
Recipe Tips
I always keep a little extra lime zest aside because it’s so fragrant. And when I’m feeling extra fancy, I rim a glass with sugar and lime zest to pair with the syrup in a cocktail or mocktail.

Lime Syrup Recipe
Ingredients
Equipment
Method
- Sterilize your jar or bottle by washing with hot soapy water and rinsing well. I sometimes pour boiling water inside just to be safe.
- Wash the limes and juice them until you get 1/2 cup. Strain to remove seeds.
- Add the sugar, water, and strained lime juice into a saucepan.

- Warm over medium-high heat until the sugar fully dissolves and the syrup just begins to simmer.

- Remove from heat, add lime rinds or zest, then return to a gentle simmer for about 30 seconds.

- Cover and let steep 10–30 minutes depending on how strong or bitter you want the lime flavor.

- Strain the syrup, let it cool fully, then pour into your bottle and refrigerate.
Notes
FAQs:-
How long does lime syrup last?
I usually keep mine in the fridge for about 3–4 weeks, and it stays super fresh the whole time.
Can I freeze lime syrup?
Yes, totally! I freeze it in small cubes and they last up to 6 months.
Why did my lime syrup turn bitter?
It can happen if the lime rinds steep too long. I just shorten the steep time when I want a cleaner flavor.
Can I use bottled lime juice?
You can, but fresh lime juice honestly tastes way brighter and so much better.
Do I need to boil the syrup?
No, just heat it until the sugar dissolves. Boiling too long can mess with the flavor a bit.
Conclusion
I hope you enjoy this lime syrup recipe as much as I do, it’s honestly one of those little homemade things that makes my kitchen feel extra cozy.
I love how simple it is, and I always feel a tiny bit proud seeing that bright green sweetness tucked in my fridge, even if I make small mistakes along the way. Thanks for cooking with me, and I can’t wait to share more soon.
Read More:- Pork Jowl Recipe